

A hardware compressor can sound fine on its own and turn hollow as soon as you blend it with the original track. Before changing the compressor settings, check the round trip. Audio has left the interface, passed through the hardware and returned later; a second monitoring path can make the same problem harder to identify.
To use an external compressor as a DAW hardware insert, connect a spare interface line output to the compressor input, then connect its output to a spare interface line input. Route that send and return through the DAW's external-effects device, check levels and timing, and record the processed result. Keep your speaker outputs separate from the hardware send.
Choose a route you can trace
The following suggested exercise uses a recorded mono vocal, Ableton Live 12 Standard or Suite, a Scarlett 4i4 4th Gen and one channel of a Z&H 1178. The goal is to control louder phrases without losing the beginnings of words.
Leave Outputs 1–2 for the speakers. Send DAW Playback 3 through physical Output 3 to the 1178 LEFT INPUT, and bring LEFT OUTPUT back to rear Input 3. A balanced TRS-to-XLR male cable feeds the compressor; an XLR female-to-TRS cable returns to the interface. Each TRS jack here carries one balanced mono channel. Use straight-through balanced wiring: TRS tip to XLR pin 2, ring to pin 3, and sleeve to pin 1. Do not substitute a stereo breakout Y cable, which splits tip and ring into separate unbalanced channels; a cable's wiring and terminations matter more than a “stereo” label.
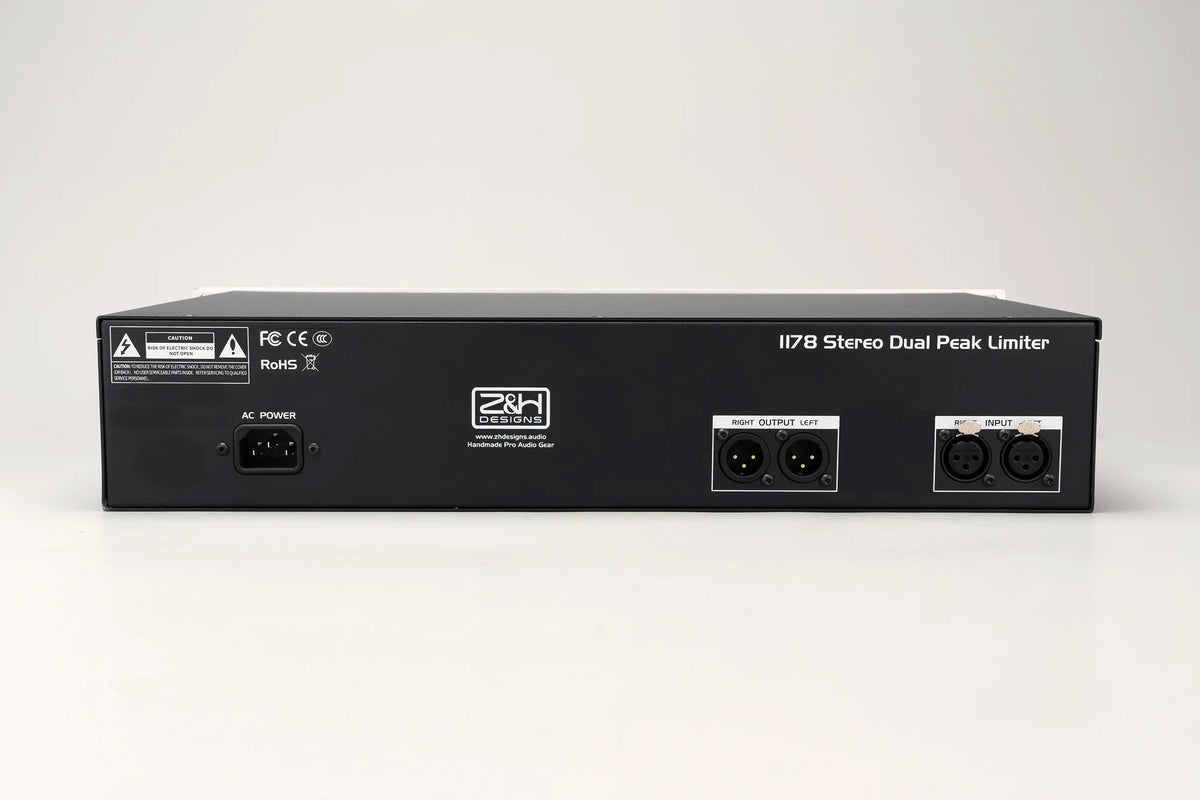
The Scarlett hardware guide identifies rear Inputs 3–4 as fixed-gain line inputs. They are separate from the front microphone/instrument inputs. That makes rear Input 3 useful here, but also means a hot compressor return must be reduced at its source. Lowering a recorded track's fader cannot repair input clipping.
Use properly wired balanced cables. Rane's Sound System Interconnection note explains the signal-pair and shield arrangement and why grounding matters when connecting equipment. If this loop introduces hum, inspect the interconnects and power arrangement; never remove a protective mains earth to silence it.
Connect and check the bypassed loop
- Prepare playback without the loop. Save a copy of the session and keep the original vocal. Choose a phrase containing a loud word, a quieter ending and a pause. Bypass other track effects for the initial check. Select the 4i4 as Live's audio input and output device, using its ASIO driver on Windows or Core Audio on macOS. Enable mono Input 3 and Output 3 in Live's Audio Settings. Keep the sample rate and buffer size fixed while checking timing. Turn the monitors down and stop playback before patching.
- Give Output 3 one source. In Focusrite Control 2's Routing tab, assign the Output 3–4 pair to DAW Playback 3–4. This exercise uses its left member, Output 3. Do not feed a Mix containing Analogue Input 3 back to that same output: that would send the return around the hardware again. Keep monitoring on 1–2 and remove direct monitoring of Input 3 from that monitor mix. The Focusrite routing guide explains how output sources are assigned. Loopback channels are software capture channels, not the rear line input used here.
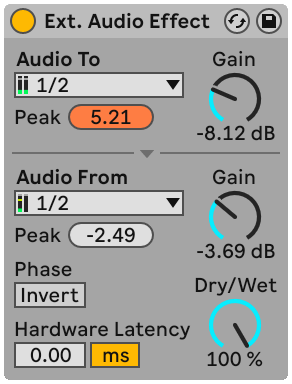
- Create the DAW loop. Put External Audio Effect on the vocal track. Select mono 3 for Audio To and mono 3 for Audio From, and set Dry/Wet to 100%. Leave the track routed to the Main output on 1–2. Start the device's send Gain low, then raise it carefully while watching the return. Do not also route the track's main output to 3 or open a second monitored input track. Ableton's external-effects guide covers this device route; External Audio Effect is available in Standard and Suite. Intro/Lite require a different track-routing setup.
- Establish a clean return. Set the 1178 to L/R and A/B for independent channels, with Mix at its full-counterclockwise OFF detent: the manual specifies fully processed output there. Use the actual BYPASS button for the initial routing and timing pass, not GR OFF. Raise the send gradually until the return is clear and comfortably below clipping. Check the interface input meter as well as Live. Leave any rear-input Line Boost at +0 dB for this check. A fixed digital peak value is not a universal analog calibration.
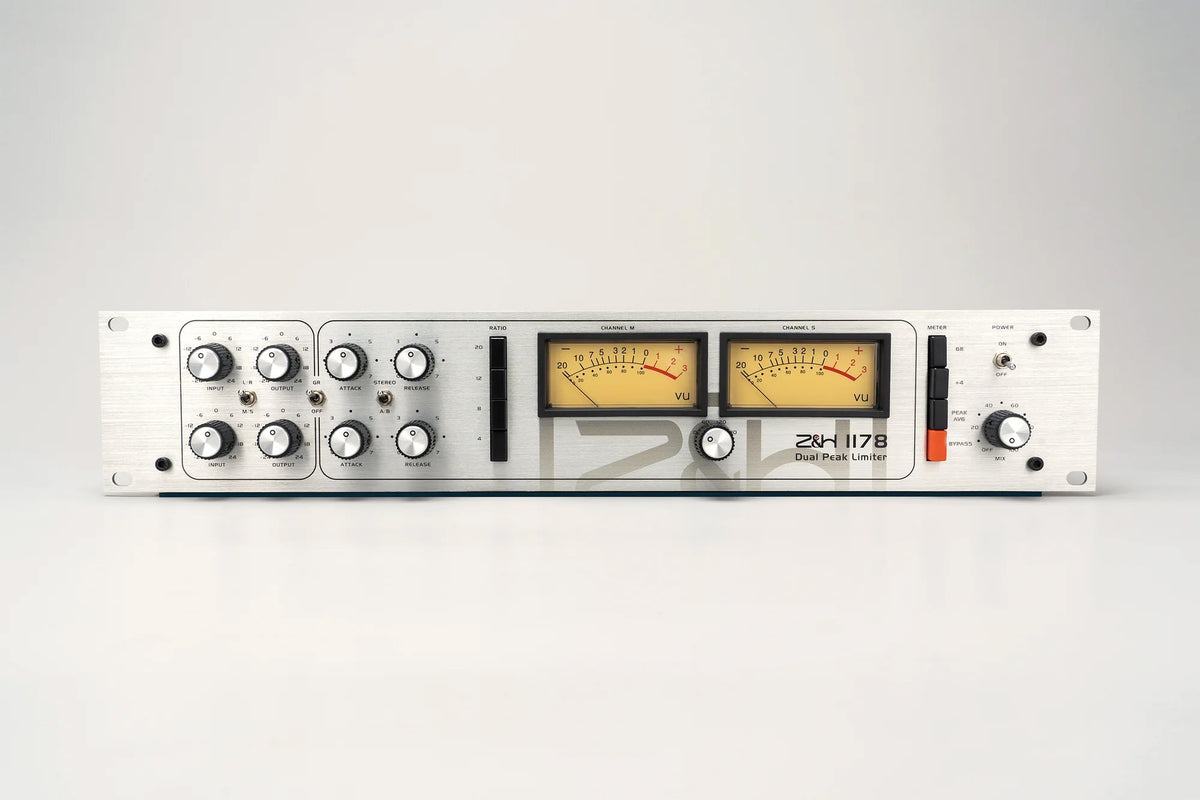
These control assignments come from the 1178 owner's manual. GR OFF disables limiting but is not the manual's clean-bypass setting. The 1178 product page provides the current model reference. A stereo insert needs two complete send/return paths and the appropriate linking setup; duplicating this mono track does not create one.
Check timing before blending dry and wet
Enable Options → Delay Compensation and leave Reduced Latency When Monitoring off for this playback test. Keep the 1178 bypassed and External Audio Effect at 100% wet, Hardware Latency zero. Save the current settings before measuring.
- Make the timing source repeatable. Place a short, low-level click or other sharp transient on the source audio track in Arrangement, with silence before it. Turn Warp off for that test clip and leave its original position unchanged. Use the same sample rate, buffer, tempo and playback start for every pass; bypass other processing on the source and Main output.
- Capture the device output. Create an audio track named LOOP TEST. Set Audio From to the source track, then Post FX, so the recording includes External Audio Effect's return. Set LOOP TEST Monitor to Off, arm it, and record across the transient with Arrangement Record. Monitor only the source track through Main 1–2; do not also monitor Input 3 directly or send LOOP TEST to Output 3. Stop, disarm LOOP TEST and inspect the captured clip with Warp off.
- Compare one time reference. Keep both clips at their recorded Arrangement positions. Zoom into the original and returned leading edges on the same timeline, with grid snapping off for the inspection. Measure the horizontal interval between the two onsets against the time ruler, rather than comparing their peak heights or separately reset clip-start markers. Convert a measured interval in seconds to milliseconds by multiplying by 1000. If using a sample-count readout in an audio editor, milliseconds = samples × 1000 / sample rate. Do not drag either clip or add Warp markers to make it line up.
- Correct and repeat. A consistently late return indicates a positive remaining offset. Enter that extra amount in Hardware Latency, then record a fresh pass using the same routing and compare again. Use milliseconds for this analog loop; Live also offers samples, which require the corresponding sample count at the current sample rate. Keep the original and each test pass until the result is repeatable. If the offset changes between passes, investigate routing and recording settings before choosing a value.
The Live 12 routing reference documents the Post FX recording point. Ableton's recording-sync guide explains the effect of monitoring on recorded timing; Monitor Off avoids the Auto/In Keep Latency branch for the test track. Warp changes clip timing, so leave it out of this measurement. These checks establish the timing setup before any compression decisions.
Live already accounts for the interface's reported Overall Latency. Hardware Latency adds compensation for delay beyond that amount, as explained in Ableton's latency reference. Do not measure the full physical round trip and enter all of it again. Use only the remaining offset measured above. Stop when a fresh pass has no repeatable onset offset at the inspection resolution. An early return calls for checking existing compensation and routing, not adding more positive delay blindly.
If even a direct cable loop gives inconsistent or misplaced recordings, use Live's built-in Driver Error Compensation lesson to check the interface reporting first: Help → Built-In Lessons → Show all built-in lessons → Hardware Setup → Driver Error Compensation. Ableton's DEC FAQ distinguishes that correction from normal playback latency. Leave DEC at zero when reporting is correct. Recheck after changes to driver, buffer, sample rate or routing; there is no universal Scarlett compensation number.
Adjust the vocal after the timing test
- Shape the loud words. After the bypassed timing test passes, disengage BYPASS and select 4:1. Start with low Input, Attack toward its slower counterclockwise end and a Release that recovers naturally between phrases. Increase Input until the loud words show a small, clearly audible reduction. Hold the send level, ratio and release fixed while moving Attack clockwise to catch more of the onset; back off if consonants lose definition. Then adjust Release, clockwise for faster recovery, and listen to the quiet ending. If it stays suppressed or the noise breathes, revisit release and reduce the amount of compression. Use Output to keep the return safe and compare at similar playback loudness.
- Keep only the improvement. Listen in the mix, including the phrase after the loud word. Keep the treatment if the vocal sits more steadily without becoming dull or pulling room noise forward. If a louder return is its main attraction, level-match again. Keep the timing configuration fixed while making this judgment, and leave both the software and hardware blend fully wet until the serial path works.
For parallel compression, choose one place to blend. The 1178's internal Mix combines its own dry and processed signals within the hardware route. Live's Dry/Wet instead combines the DAW dry path with the returned signal, so its timing check is especially important. Begin with the other blend fully processed. If the vocal loses body or sounds doubled, return to 100% wet, check for duplicate monitoring and repeat the bypassed timing test. Aligning a transient does not promise a perfect null through analog circuitry or remove every frequency-dependent phase change.
Print a pass you can reopen
Create an audio track named VOCAL PRINT. Set Audio From to the vocal track containing External Audio Effect and choose Post FX. Set PRINT's Monitor to Off, arm it and record while the source track supplies monitoring. Start early enough to capture the first word and let the end decay. Live's post-effects recording instructions describe this internal capture point; it records the processed device chain without the source track's mixer level and pan. Use Post Mixer if those mixer moves are part of the intended print.
After recording, stop playback, disable the original hardware-processing track, disarm PRINT and send the printed clip to Main 1–2 for its own playback. Check the start, loudest word, quiet ending and tail. Do not play the original and print together unless you are deliberately setting up a checked parallel blend. Preserve the dry clip, photograph the controls, and note the send/return ports, sample rate, buffer and compensation value. External processing needs a real-time pass; an offline export cannot ask disconnected hardware to recreate it.
| Symptom | Check first | Next action |
|---|---|---|
| No return | Physical Input 3 and Audio From 3 | Trace each cable and inspect interface input metering before raising gain. |
| Rapidly rising level or howl | Return routed into Output 3's source | Stop playback, mute the send and remove the feedback route before restarting quietly. |
| Clean dry track, clipped print | 1178 Output and interface input meter | Reduce the analog return level and record again. |
| Hollow parallel blend | Double monitoring and remaining timing offset | Use one return path and repeat the bypassed transient test. |
Once the print survives those checks, compare it with the dry vocal at matched playback loudness inside the full song. Keep the version that lets the words stay present through the loud phrase and the quiet ending. The saved audio, not a remembered knob position, is what lets the session reopen without the hardware.